


이렇게 빨간색 x로 뜨는 오류는 코드를 수정하지 않는 이상 해결 할 수 없다.
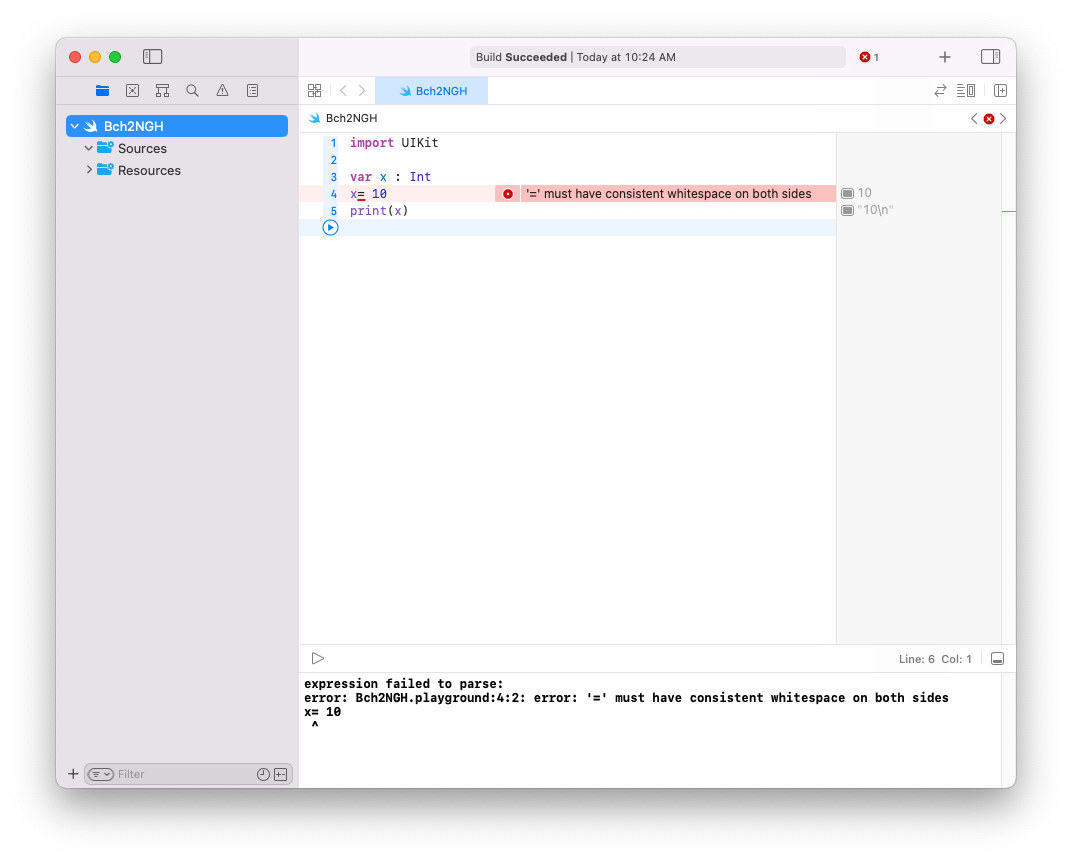

이런식으로 동그란 빨간색이 뜨는 오류는 자동으로 고치도록 할 수 있다.

초기값이 있을 경우 변수나 상수 선언 시에 타입을 생략할 수 있다. 컴파일러가 타입을 추론하여 처리해준 것이다.


문자열 안에 변수나 상수의 값을 넣고 싶으면 \() 안에 변수나 상수를 작성하면 된다.

타입을 작성하지 않으면 오류가 발생한다. 여기에 적어주는 타입을 타입 어노테이션이라고 한다.


Minimum Deployments는 실행 가능한 환경이 해당 iOS 버전보다 같거나 높아야한다고 설정할 수 있다.

Portrait은 세로, Landscape는 가로로 기울였을 때이다.


import UIKit

class ViewController: UIViewController {

    override func viewDidLoad() {
        super.viewDidLoad()
        print("viewDidLoad")
    }

    override func viewWillAppear(_ animated: Bool) {
        print("viewWillAppear")
    }

    override func viewDidAppear(_ animated: Bool) {
        print("viewDidAppear")
    }
}
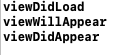
실행해보면 출력 결과의 순서가 일정한 순서로 이루어져 있다는 것을 알 수 있다. 생명 주기 순서에 따라 메서드가 호출되는 것이다.
https://developer.apple.com/documentation/uikit/app_and_environment/managing_your_app_s_life_cycle
Managing your app’s life cycle | Apple Developer Documentation
Respond to system notifications when your app is in the foreground or background, and handle other significant system-related events.
developer.apple.com
위의 페이지에서 앱의 라이프 사이클을 살펴볼 수 있다.
- Foreground
- Active : 앱이 전경에 있고 이벤트를 받고 있음. 일반적으로 사용자와 상호작용하는 동안 앱은 이 상태에 있음
- Inactive : 앱이 전경에 있지만 이벤트를 받고 있지 않음
- Background
- Running : 앱이 백그라운드에 있지만 여전히 코드를 실행. 사용자가 다른 앱으로 전환하거나 홈 화면으로 돌아갔을 때 앱은 일시적으로 이 상태에 머물게 됨
- Suspend : 앱이 백그라운드에 있지만 코드를 실행하지 않음. 시스템은 앱을 이 상태로 자동으로 전환하며 필요에 따라 메모리를 회수하기 위해 앱을 종료시킬 수 있음.
https://developer.apple.com/documentation/uikit/uiviewcontroller
UIViewController | Apple Developer Documentation
An object that manages a view hierarchy for your UIKit app.
developer.apple.com
라이프사이클은 앱뿐만 아니라 뷰도 있다. 위의 페이지에서 뷰 라이프 사이클을 살펴볼 수 있다.
- ViewDidLoad : 뷰 컨트롤러 클래스가 생성될 때, 가장 먼저 실행. 딱 한 번 실행되기 때문에 초기화 할 때 사용한다.
- ViewWillAppear : 뷰가 생성되기 직전에 항상 실행이 되기 때문에 뷰가 나타나기 전에 실행해야 하는 작업들을 여기서 한다.
- ViewDidAppear : 뷰가 생성되고 난 뒤에 실행. 데이터를 받아서 화면에 뿌려주거나 애니메이션 등의 작업을 하는 로직을 작성한다. ViewWillAppear에서 로직을 넣었다가 뷰에 반영이 안되는 경우가 있기 때문이다.
https://developer.apple.com/documentation/uikit/uiviewcontroller
UIViewController | Apple Developer Documentation
An object that manages a view hierarchy for your UIKit app.
developer.apple.com

view가 어디서 만들어진 것인지 알 수 있다.
Switf에서는 멤버 변수를 프로퍼티라고 한다. view는 UIViewController의 프로퍼티이다. 해당 클래스를 상속받아서 사용할 수 있는 것이다.


색상을 랜덤으로 표현하려면 어떻게 해야 할까?
import UIKit

class ViewController: UIViewController {

    override func viewDidLoad() {
        super.viewDidLoad()
//        self.view.backgroundColor = UIColor.green
        let red = CGFloat(arc4random_uniform(256)) / 255.0
        let green = CGFloat(arc4random_uniform(256)) / 255.0
        let blue = CGFloat(arc4random_uniform(256)) / 255.0
        self.view.backgroundColor = UIColor(red: red, green: green, blue: blue, alpha: 1.0)
    }
}
이렇게 작성하면 랜덤 색상을 배경화면으로 지정할 수 있다.
1초마다 화면의 색상을 바뀌게 하려면 어떻게 해야할까?
import UIKit

class ViewController: UIViewController {

  var colorChangeTimer: Timer?

  override func viewDidLoad() {
    super.viewDidLoad()

    colorChangeTimer = Timer.scheduledTimer(withTimeInterval: 1.0, repeats: true) { timer in
      let red = CGFloat(arc4random_uniform(256)) / 255.0
      let green = CGFloat(arc4random_uniform(256)) / 255.0
      let blue = CGFloat(arc4random_uniform(256)) / 255.0

      self.view.backgroundColor = UIColor(red: red, green: green, blue: blue, alpha: 1.0)
    }

  }

  override func viewDidDisappear(_ animated: Bool) {
    super.viewDidDisappear(animated)

    colorChangeTimer?.invalidate()
    colorChangeTimer = nil
  }
}
Timer를 사용하면 일정 시간마다 반복할 수 있다. 홈화면에 나갔을 때 자원을 낭비하지 않기 위해 아래의 viewDidDisappear()를 사용했다.
import UIKit

import AVFoundation  // 오디오를 다루기 위한 프레임워크 추가

class ViewController: UIViewController {

    var colorChangeTimer: Timer?
    var audioPlayer: AVAudioPlayer!

    override func viewDidLoad() {
        super.viewDidLoad()

        // 배경 음악 재생 설정
        if let soundURL = Bundle.main.url(forResource: "bgm", withExtension: "mp3") {
            do {
                audioPlayer = try AVAudioPlayer(contentsOf: soundURL)
                audioPlayer.play()
            } catch {
                print("음악 파일 로드 또는 재생 중 에러 발생: \(error)")
            }
        }

        // 1초마다 반복되는 타이머 생성
        colorChangeTimer = Timer.scheduledTimer(withTimeInterval: 1.0, repeats: true) { timer in
            // 랜덤한 빨간색, 초록색, 파란색 값을 생성
            let red = CGFloat(arc4random_uniform(256)) / 255.0
            let green = CGFloat(arc4random_uniform(256)) / 255.0
            let blue = CGFloat(arc4random_uniform(256)) / 255.0
            self.view.backgroundColor = UIColor(red: red, green: green, blue: blue, alpha: 1.0)
        }
    }

    override func viewDidDisappear(_ animated: Bool) {
        super.viewDidDisappear(animated)

        // ViewController가 사라질 때 타이머를 중지하고 nil로 설정하여 메모리 누수를 방지
        colorChangeTimer?.invalidate()
        colorChangeTimer = nil

        // 음악 재생 중지
        audioPlayer.stop()
    }
}
음악 파일을 추가해서 배경음악을 재생시켰다.
import UIKit
import AVFoundation

class ViewController: UIViewController {

    var colorChangeTimer: Timer?
    var audioPlayer: AVAudioPlayer!

    override func viewDidLoad() {
        super.viewDidLoad()

        let tapGesture = UITapGestureRecognizer(target: self, action: #selector(handleTapGesture))
        view.addGestureRecognizer(tapGesture)

        NotificationCenter.default.addObserver(self, selector: #selector(applicationWillEnterForeground), name: UIApplication.willEnterForegroundNotification, object: nil)
    }

    @objc func applicationWillEnterForeground() {
        startTimerAndMusic()
    }

    @objc func handleTapGesture() {
        stopTimerAndMusic()

        let alert = UIAlertController(title: "알림", message: "앱을 종료해주세요.", preferredStyle: .alert)
        let okAction = UIAlertAction(title: "확인", style: .default, handler: nil)
        alert.addAction(okAction)
        present(alert, animated: true, completion: nil)
    }

    func startTimerAndMusic() {
        // 배경 음악 재생 설정
        if let soundURL = Bundle.main.url(forResource: "bgm", withExtension: "mp3") {
            do {
                audioPlayer = try AVAudioPlayer(contentsOf: soundURL)
                audioPlayer.play()
            } catch {
                print("음악 파일 로드 또는 재생 중 에러 발생: \(error)")
            }
        }

        // 1초마다 반복되는 타이머 생성
        colorChangeTimer = Timer.scheduledTimer(withTimeInterval: 1.0, repeats: true) { timer in
            // 랜덤한 빨간색, 초록색, 파란색 값을 생성
            let red = CGFloat(arc4random_uniform(256)) / 255.0
            let green = CGFloat(arc4random_uniform(256)) / 255.0
            let blue = CGFloat(arc4random_uniform(256)) / 255.0

            // 생성된 랜덤 색상을 사용하여 ViewController의 배경색 설정
            self.view.backgroundColor = UIColor(red: red, green: green, blue: blue, alpha: 1.0)
        }
    }

    func stopTimerAndMusic() {
        // 타이머와 음악 재생 중지
        colorChangeTimer?.invalidate()
        colorChangeTimer = nil
        audioPlayer.stop()
    }
}
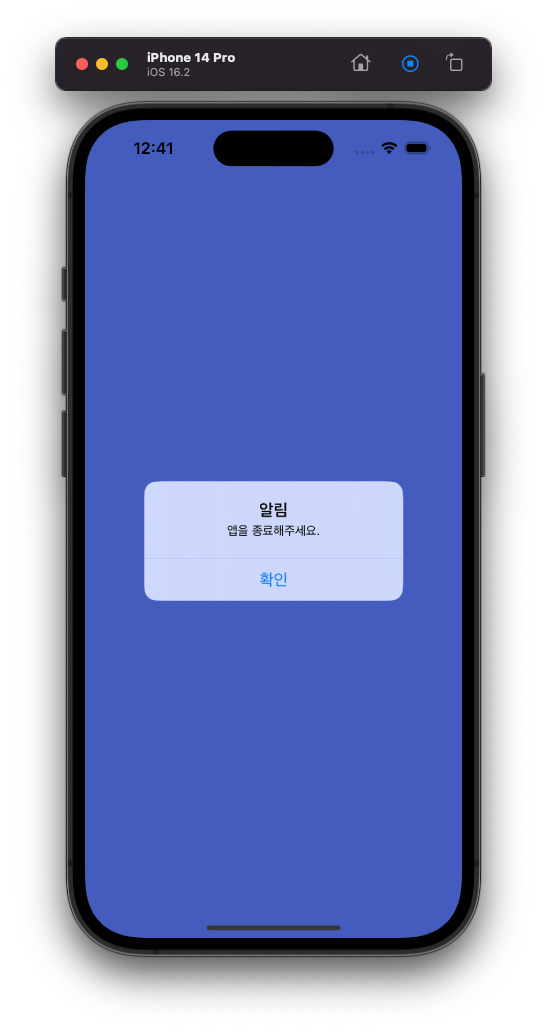
이렇게 화면을 누르면 alert창이 나오게 하였다.
import UIKit
import AVFoundation

// UIViewController를 상속받는 ViewController 클래스 정의
class ViewController: UIViewController {

    // UIColor 변경을 위한 타이머 변수 선언, 초기값은 nil
    var colorChangeTimer: Timer?
    // 배경 음악 재생을 위한 AVAudioPlayer 변수 선언
    var audioPlayer: AVAudioPlayer!

    // 스토리보드에서 연결한 UISwitch 아웃렛 변수 선언
    @IBOutlet weak var musicSwitch: UISwitch!

    // 뷰가 로드되었을 때 호출되는 메소드
    override func viewDidLoad() {
        super.viewDidLoad()

        // 탭 제스처 인식 객체 생성 및 설정
        let tapGesture = UITapGestureRecognizer(target: self, action: #selector(handleTapGesture))
        view.addGestureRecognizer(tapGesture)

        // 앱이 포어그라운드로 돌아올 때 알림을 받기 위한 NotificationCenter 설정
        NotificationCenter.default.addObserver(self, selector: #selector(applicationWillEnterForeground), name: UIApplication.willEnterForegroundNotification, object: nil)
    }

    // 앱이 포어그라운드로 돌아왔을 때 호출되는 메소드
    @objc func applicationWillEnterForeground() {
        startTimerAndMusic()
    }

    // 탭 제스처가 인식되었을 때 호출되는 메소드
    @objc func handleTapGesture() {
        stopTimerAndMusic()
        colorChangeTimer = nil
        audioPlayer = nil

        // 사용자에게 앱 종료를 요청하는 알림창 생성 및 표시
        let alert = UIAlertController(title: "알림", message: "앱을 종료해주세요.", preferredStyle: .alert)
        let okAction = UIAlertAction(title: "확인", style: .default, handler: nil)
        alert.addAction(okAction)
        present(alert, animated: true, completion: nil)
    }

    // UISwitch의 상태가 변경될 때 호출되는 메소드
    @IBAction func switchDidChange(_ sender: UISwitch) {
        if sender.isOn {
            startTimerAndMusic()
        } else {
            stopTimerAndMusic()
        }
    }

    // 타이머와 음악 재생을 시작하는 메소드
    func startTimerAndMusic() {
        // 배경 음악 재생 설정
        if let soundURL = Bundle.main.url(forResource: "bgm", withExtension: "mp3") {
            do {
                audioPlayer = try AVAudioPlayer(contentsOf: soundURL)
                audioPlayer.play()
            } catch {
                print("음악 파일 로드 또는 재생 중 에러 발생: \(error)")
            }
        }

        // 1초마다 반복되는 타이머 생성 및 랜덤 색상 변경 로직 구현
        colorChangeTimer = Timer.scheduledTimer(withTimeInterval: 1.0, repeats: true) { timer in
            // 랜덤한 빨간색, 초록색, 파란색 값을 생성
            let red = CGFloat(arc4random_uniform(256)) / 255.0
            let green = CGFloat(arc4random_uniform(256)) / 255.0
            let blue = CGFloat(arc4random_uniform(256)) / 255.0

            // 생성된 랜덤 색상을 사용하여 ViewController의 배경색 설정
            self.view.backgroundColor = UIColor(red: red, green: green, blue: blue, alpha: 1.0)
        }
    }

    // 타이머와 음악 재생을 중지하는 메소드
    func stopTimerAndMusic() {
        // 타이머와 음악 재생 중지
        colorChangeTimer?.invalidate()
        colorChangeTimer = nil
        audioPlayer.stop()
    }
}
스위치를 통해서 배경화면 변경과 배경음악을 중지시킬 수 있다.
'공부 > Swift' 카테고리의 다른 글
| [iOS][5주차] Swift 문법 복습 / TableView (0) | 2024.04.04 |
|---|---|
| [iOS][3&4주차] 간단한 앱 만들기, 문법 복습 (0) | 2024.03.28 |
| [iOS][1주차] 들어가기 (0) | 2024.03.07 |
| [Swift][13주차] BMI 계산기 (0) | 2023.11.27 |
| [Swift][12주차] bmi 계산기2 (0) | 2023.11.20 |