
앱을 만드는 절차
file new project - iOS App - storyboard
프로젝트 설정을 함
assistant editor 변수 - Outlet 함수 - Action
연결 잘 되었는지 확인하는 법 ...inspector에서 확인
소스코드에서 함수를 작성하여 완료


배경을 추가하는 방법

이렇게 배경을 넣으려고 하면 화면이 다 가려지는 현상이 있을 수 있다. 이는 z-index 때문에 그런 것으로 이미지 뷰를 맨 뒤쪽으로 보내버리면 된다.

이렇게 제일 위쪽으로 올리면 맨 뒤로 간다.

그리고 이렇게 알파 값을 조절해서 꾸밀 수도 있다.


스위치를 이용하여 껐다 켜는 동작을 할 수 있다.

segmented control을 사용하면 여러개 중에서 선택할 수 있다. 사진에서는 두 개이지만 요소를 더 추가할 수도 있다.

이름은 마음대로 짓고 나머지는 원하는 동작과 타입으로 설정해 주면 된다.


editor의 embed in을 통해서 tab bar controller를 포함시킬수 있다.

이렇게 탭 아이콘을 수정할 수 있다.

탭 바 컨트롤러를 붙이면 뷰 컨트롤러 앞에 붙게 되고 두개가 Relationship Seque로 연결된다.
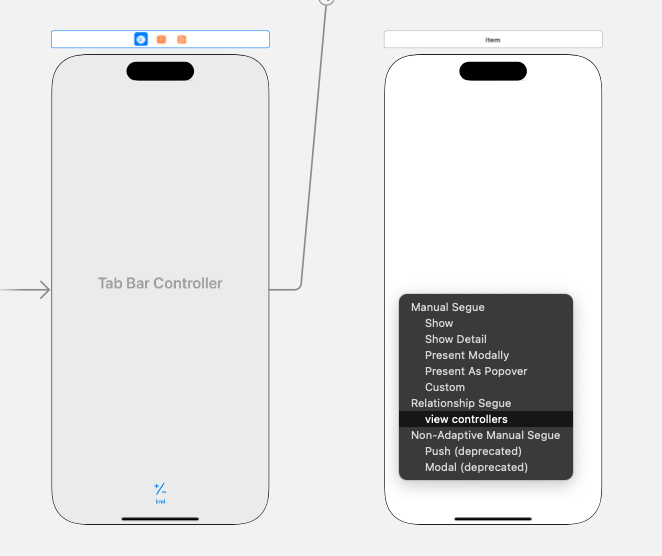
마우스 우클릭으로 탭 바 컨트롤러에서 새로 만든 뷰 컨트롤러로 이동시키면 Relationship Segue를 연결할 수 있다.

새 컨트롤러 파일을 만들 때 클래스명과 부모 클래스를 지정한다.

비디오를 넣을 때 Add to targets에서 꼭 체크를 해주어야 한다.
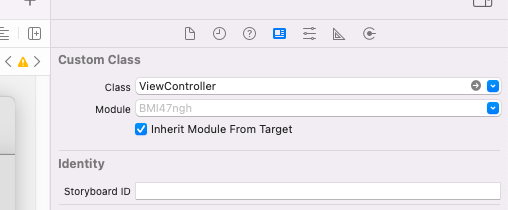
원래의 화면에서는 이렇게 클래스가 잘 연결되어 있지만 새로 만든 화면은 아래와 같이 클래스가 연결되어 있지 않아서 연결해주어야 제대로 작동한다.


VideoViewController 클래스와 연결을 해주었다.
import UIKit
import AVKit

class ViewController: UIViewController {
    var player: AVPlayer?

    override func viewDidLoad() {
        super.viewDidLoad()

        // 비디오 파일의 경로를 가져옵니다.
        guard let videoPath = Bundle.main.path(forResource: "BMI", ofType: "mp4") else {
            print("비디오 파일을 찾을 수 없습니다.")
            return
        }

        // 비디오 파일의 URL을 생성합니다.
        let videoURL = URL(fileURLWithPath: videoPath)

        // AVPlayer 객체를 생성하여 비디오를 재생합니다.
        player = AVPlayer(url: videoURL)

        // AVPlayer를 사용하는 뷰 컨트롤러인 AVPlayerViewController를 생성합니다.
        let playerViewController = AVPlayerViewController()
        playerViewController.player = player

        // AVPlayerViewController를 현재의 뷰 컨트롤러에 추가합니다.
        addChild(playerViewController)
        view.addSubview(playerViewController.view)
        playerViewController.view.frame = view.bounds
        playerViewController.didMove(toParent: self)

        // 비디오를 재생합니다.
        player?.play()
    }
}
ChatGPT에게 bmi.mp4 영상을 재생하는 방법을 알려달라고 했다.
@IBAction func PlayVideo(_ sender: UIButton) {
        let file:String? = Bundle.main.path(forResource:"bmi", ofType: "mp4")
        let url = NSURL(fileURLWithPath: file!)
        let playerController = AVPlayerViewController()
        let player = AVPlayer(url: url as URL)
        playerController.player = player
        self.present(playerController, animated: true)

        player.play()
    }
이것이 작성한 코드이다.
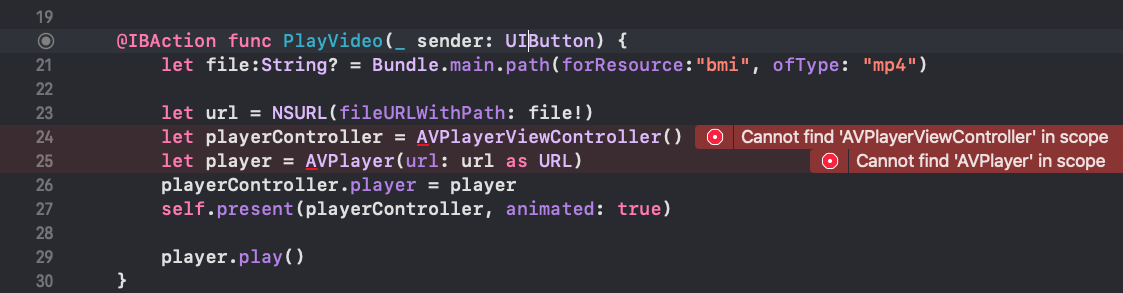
비디오 관련 메서드를 사용하려면 import AVKit을 해야 한다.
https://developer.apple.com/documentation/uikit/uiviewcontroller/1621380-present
이제 세 번째 탭을 만들어서 인터넷 창을 띄워보자

deprecated는 사용하지 말고 밑에거를 선택해서 사용하자.

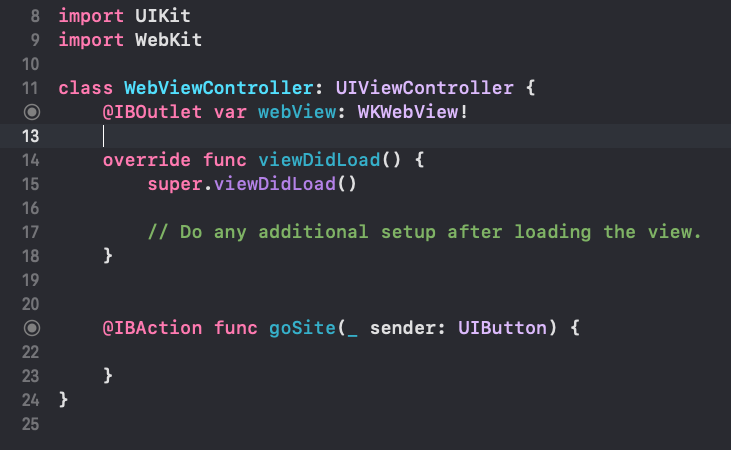
이번에는 Webkit을 import하여 사용하자.
https://developer.apple.com/documentation/webkit/wkwebview
WKWebView | Apple Developer Documentation
An object that displays interactive web content, such as for an in-app browser.
developer.apple.com


잘 작동한다.


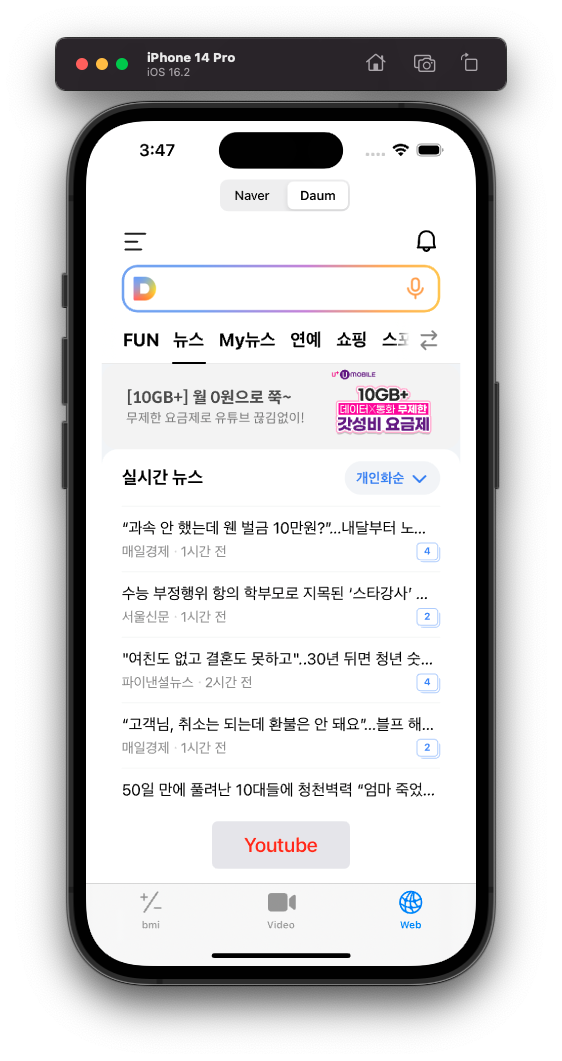
segmented control을 추가하여 네이버와 다음으로 이동할 수 있도록 했다.
'공부 > Swift' 카테고리의 다른 글
| [iOS][2주차] 스위프트 복습 (0) | 2024.03.14 |
|---|---|
| [iOS][1주차] 들어가기 (0) | 2024.03.07 |
| [Swift][12주차] bmi 계산기2 (0) | 2023.11.20 |
| [Swift][11주차] 소스 실습 및 BMI 계산기 만들기1 (0) | 2023.11.13 |
| [Swift][10주차] 9주차 마무리 및 앱 만들기 (0) | 2023.11.06 |