
Service Discovery는 MSA에서 각 마이크로 서비스들을 등록하고 필요한 시점에 원하는 마이크로 서비스의 위치를 찾아주는 역할을 담당한다. 예를 들어서 회원 마이크로 서비스가 여러 인스턴스로 각기 다른 포트번호를 가졌을 때 직접 한 인스턴스에 접근하려면 호스트네임이나 포트번호를 알아야 하는데 유저 마이크로 서비스에서 미리 자신의 인스턴스를 유레카 서비스 디스커버리에 등록하여 게이트웨이에서 유레카를 통해 정보를 얻어 해당 마이크로 서비스로 포워딩해주는 것이다.
준비
https://cloud.spring.io/spring-cloud-netflix/reference/html/#spring-cloud-eureka-server
Spring Cloud Netflix
This project provides Netflix OSS integrations for Spring Boot apps through autoconfiguration and binding to the Spring Environment and other Spring programming model idioms. With a few simple annotations you can quickly enable and configure the common pat
cloud.spring.io

Spring Cloud Discovery에서 Eureka Server를 선택하자.
회원, 쿠폰과 같은 마이크로 서비스들은 Eureka Discovery Client를 선택하면 된다.
dependencies {
    implementation 'org.springframework.cloud:spring-cloud-starter-netflix-eureka-server'
    compileOnly 'org.projectlombok:lombok'
    annotationProcessor 'org.projectlombok:lombok'
    testImplementation 'org.springframework.boot:spring-boot-starter-test'
}
위와 같은 의존성 패키지가 추가된다.
설정

@SpringBootApplication 어노테이션이 있는 곳에 @EnableEurekaServer 어노테이션을 추가한다.
spring:
  application:
    name: service-discovery

server:
  port: 8761

eureka:
#  instance:
#    hostname: 127.0.0.1

  client:
    registerWithEureka: false
    fetchRegistry: false
#    serviceUrl:
#      defaultZone: http://${eureka.instance.hostname}:${server.port}/eureka/
그리고 application.yaml 에 위와 같은 내용을 작성해준다.
공식 문서 도큐먼트를 보고 작성하였다.
serviceUrl이나 hostname은 지금 상황에서는 굳이 작성하지 않아도 된다.
registerWithEureka 는 Eureka Server에 등록할지 여부를 설정하는 부분인데 지금은 서버를 설정하는 부분이라 서버에 서버를 등록할 필요는 없으므로 false로 설정한다.
fetchRegistry 도 등록 정보를 가져오는 부분이라 같은 이유로 false로 설정한다.
다른 부가적인 설정 정보는 아래 문서에서 확인할 수 있다.
https://cloud.spring.io/spring-cloud-netflix/reference/html/appendix.html
Common application properties
Various properties can be specified inside your application.properties file, inside your application.yml file, or as command line switches. This appendix provides a list of common Spring Cloud Netflix properties and references to the underlying classes tha
cloud.spring.io
실행
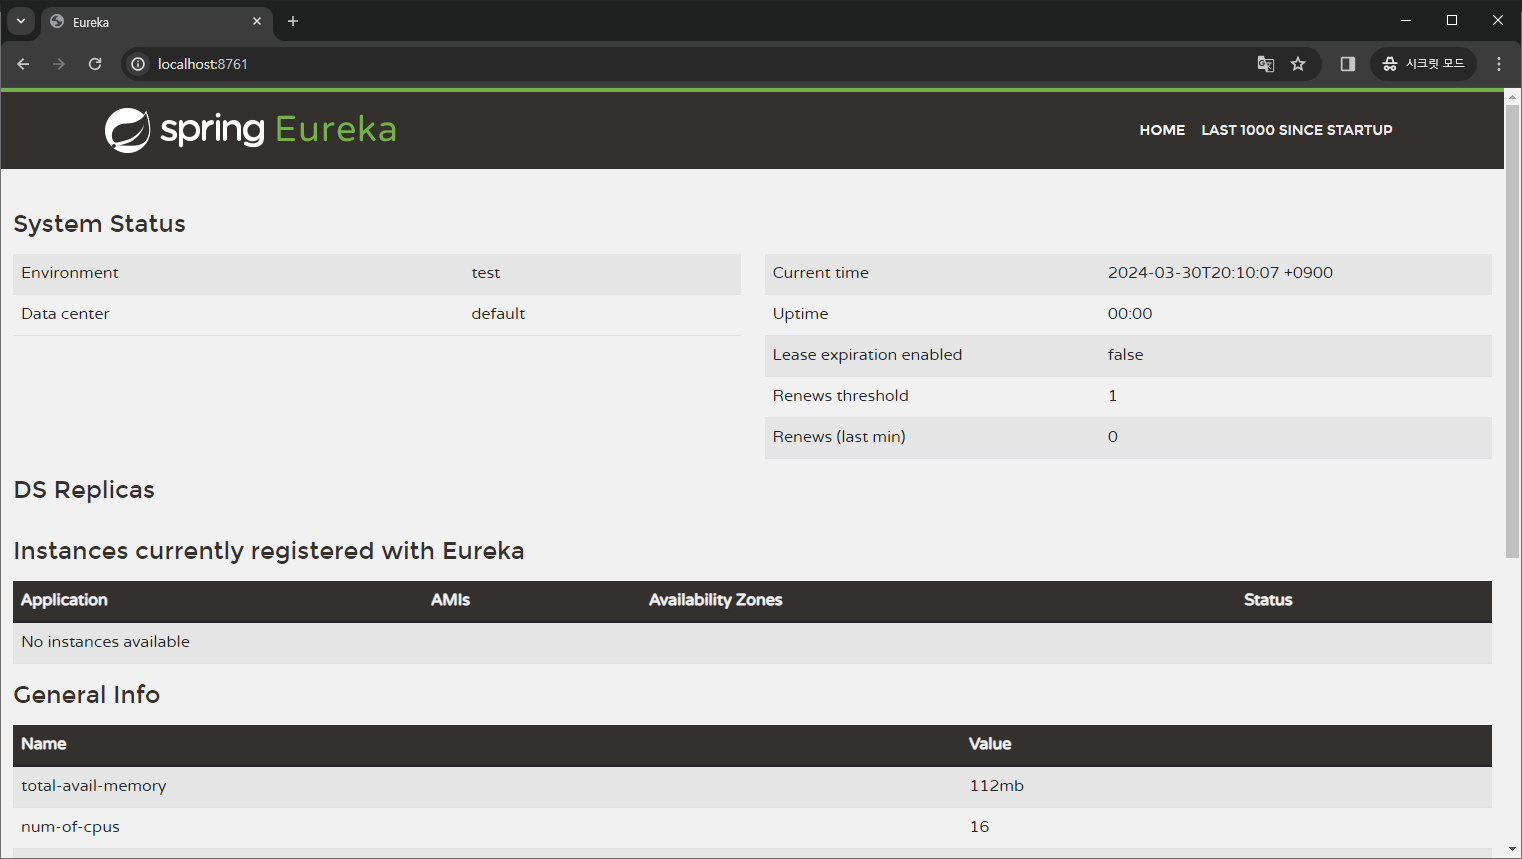
이제 어플리케이션을 실행시키고 localhost:8761로 접속하면 위와 같은 대시보드가 나타난다.
나중에 Eureka Discovery Client로 등록한 서비스들이 기동 되면 주소나 health 정보 등의 여러 정보가 여기에 출력된다.
'공부 > Spring Cloud' 카테고리의 다른 글
| [Spring Cloud][3] User 마이크로 서비스 구현하기 1 (1) | 2024.04.28 |
|---|---|
| [Spring Cloud] Kafka cluster와 H2 포트 충돌 해결하기 (0) | 2024.04.08 |
| [Spring Cloud] log4j:ERROR Could not read configuration file 해결하기 (0) | 2024.04.05 |
| [Spring Cloud][2] Eureka Discovery Client 등록하기 (0) | 2024.03.31 |
| [Spring Cloud] 앞으로 구현할 마이크로 서비스 구조 계획 (0) | 2024.03.29 |