
저번에는 유레카 서버를 만들었으니 이번에는 유레카 클라이언트를 등록해보자.
준비
https://cloud.spring.io/spring-cloud-netflix/reference/html/index.html
Spring Cloud Netflix
This project provides Netflix OSS integrations for Spring Boot apps through autoconfiguration and binding to the Spring Environment and other Spring programming model idioms. With a few simple annotations you can quickly enable and configure the common pat
cloud.spring.io

dependencies {
    implementation 'org.springframework.boot:spring-boot-starter-web'
    implementation 'org.springframework.cloud:spring-cloud-starter-netflix-eureka-client'
    compileOnly 'org.projectlombok:lombok'
    annotationProcessor 'org.projectlombok:lombok'
    testImplementation 'org.springframework.boot:spring-boot-starter-test'
}
설정
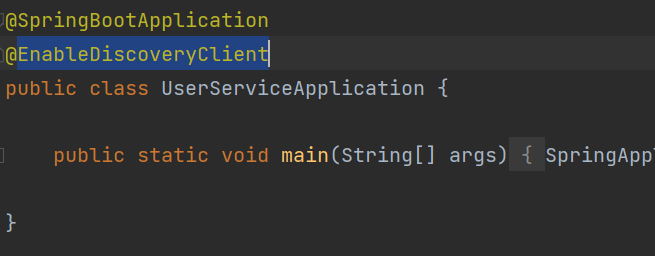
@SpringBootApplication 어노테이션이 있는 곳에 @EnableDiscoveryClient 어노테이션을 추가해주자.
spring:
  application:
    name: user-service

server:
  port: 0

eureka:
  client:
    register-with-eureka: true
    fetch-registry: true
    service-url:
      defaultZone: http://127.0.0.1:8761/eureka/
다음은 application.yaml 을 수정해야 한다.
유레카 서버 설정을 작성할 때는 카멜케이스로 작성했지만 이번에는 케밥케이스로 작성해 보았다. 두 방식 모두 사용하능하지만 url을 지정할 때 defaultZone 만큼은 카멜케이스로 작성해야 한다.
어플리케이션 이름은 user-service라고 설정했다.
포트 번호는 0으로 설정했는데 이렇게 설정하면 포트 번호가 랜덤으로 지정된다. 랜덤으로 지정하는 이유는 나중에 user-service 가 여러 인스턴스로 운영될 때 포트 번호를 임의로 지정하면 같은 PC인 경우 포트 충돌이 나기 때문이다.
클라이언트 설정에서 이번에는 register-with-eureka와 fetch-registry를 true로 설정했다. 서버 측에 자신의 정보를 등록해야 하기 때문이다. 그리고 service-url의 defaultZone으로 유레카 서버의 주소를 지정해 주었다.
여기까지 했으면 준비는 다 끝났다!
이제 실행해 보자.
실행

먼저 유레카 서버를 기동한 뒤에 user-service를 기동해보자. 그러면 위와 같이 user-service에 대한 정보를 볼 수 있게 된다.
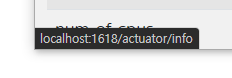
Status의 초록색으로 표시된 부분에 마우스를 올려보면 실제 기동되고 있는 주소가 브라우저 왼쪽 아래에 표시된다.
액추에이터는 아직 설정하지 않았으므로 눌러도 아무것도 표시되지 않는다.
Application은 spring.application.name으로 설정한 부분이 대문자로 변경되어서 출력되었다.
Status는 hostname, application name, port 순으로 연결되어 출력된 것 같은데 여기서 문제는 같은 user-service가 여러 개 기동되면 다 같은 이름으로 표시된다는 것이다. 그렇기 때문에 다음과 같이 yaml 파일에 instance-id를 지정해주었다.
spring:
  application:
    name: user-service

server:
  port: 0


eureka:
  client:
    register-with-eureka: true
    fetch-registry: true
    service-url:
      defaultZone: http://127.0.0.1:8761/eureka/

  instance:  # 이 부분 추가
    instance-id: ${spring.cloud.client.ip-address}:${random.value}

이제 랜덤한 값을 추가로 표시할 수 있다.
문제 해결

user-service를 기동하고 중지함을 반복하다보면 위와 같이 DOWN이라는 표시와 함께 이전 서비스의 정보가 남아있는 것을 알 수 있다. 오래 기다리면 사라지긴 매번 기다리는 건 여간 귀찮은 작업이 아닐 수 없다. 그렇기 때문에 application.yaml 파일에 다음과 같은 설정을 추가로 해주었다.
spring:
  application:
    name: user-service

server:
  port: 0


eureka:
  client:
    register-with-eureka: true
    fetch-registry: true
    service-url:
      defaultZone: http://127.0.0.1:8761/eureka/
  instance:
    instance-id: ${spring.cloud.client.ip-address}:${random.value}
    # 아래 부분 추가
    lease-renewal-interval-in-seconds: 1
    lease-expiration-duration-in-seconds: 2
lease-renewal-interval-in-seconds 는 얼마나 자주 유레카 서버에 자신의 정보를 넘길지를 설정하는 부분이다.
기본값은 30초 이지만 지금은 테스트 단계이므로 변화를 빨리 확인하기 위해 1초로 설정해주었다.
lease-expiration-duration-in-seconds 는 마지막 heart-beat 즉, 마지막으로 연결되었을 때 기준으로 몇 초 후에 해당 서비스를 유레카 서버에서 제거할 지를 설정하는 부분이다.
기본 값은 90초이지만 위와 같은 이유로 2초로 변경해주었다.
다음은 유레카 서버 측의 설정을 변경해야 한다.
spring:
  application:
    name: service-discovery

server:
  port: 8761

eureka:
  # 아래 서버 설정 추가
  server:
    enable-self-preservation: false
    eviction-interval-timer-in-ms: 3000

  client:
    register-with-eureka: false
    fetch-registry: false
server 설정을 두 가지 추가해주었다.
enable-self-preservation 는 유레카 클라이언트 서비스들이 네트워크 문제 등으로 연결이 끊겼을 때 다시 연결될 때까지 기다려서 재연결 시 복구하는 기능이다. 테스트 단계에는 꺼놓지만 실제 운영 시에는 true로 해야 한다.
eviction-interval-timer-in-ms 는 연결이 끊긴 서비스를 등록 해제할 때까지 기다리는 시간이다. 밀리초이므로 3000으로 설정하여 3초 후에 놓아주도록 했다.

이제 서버와 클라이언트 모두 재시작하고 다시 user-service를 재기동해보면 바로 DOWN 되었던 서비스가 없어지는 것을 확인할 수 있다.
위의 빨간색 경고는 enable-self-preservation를 false로 설정해서 나타나는 부분이니 그냥 무시하자.
'공부 > Spring Cloud' 카테고리의 다른 글
| [Spring Cloud][3] User 마이크로 서비스 구현하기 1 (1) | 2024.04.28 |
|---|---|
| [Spring Cloud] Kafka cluster와 H2 포트 충돌 해결하기 (0) | 2024.04.08 |
| [Spring Cloud] log4j:ERROR Could not read configuration file 해결하기 (0) | 2024.04.05 |
| [Spring Cloud][1] Service Discovery 구현하기 (0) | 2024.03.30 |
| [Spring Cloud] 앞으로 구현할 마이크로 서비스 구조 계획 (0) | 2024.03.29 |